Showing posts with label The Video Itself. Show all posts

Sunday, 18 March 2012

Analysis - My Thoughts

After the hours of work my group put in to plan, film, and later create this video I am thoroughly pleased with the outcome. I believe we have added all the necessary conventions that make a music video at a high standard.

My favourite part of the music video is over a 7 second period (2:30-2:37) where we used very short snaps of some of the best cuts we got from filming, each shot is barely half a second long. This is a convention used in all kinds of videos including films, music videos and advertisements. Below are some screen shots taken from our music video; displaying how we used each convention necessary when filming and editing to create a high end production.

Opening scene, editing text

Fade from story to band

Fade from narratives with the same mise-en-scene

Bloom effect

Close up on base drum

Urban setting used

Fade from band to narrative short clips
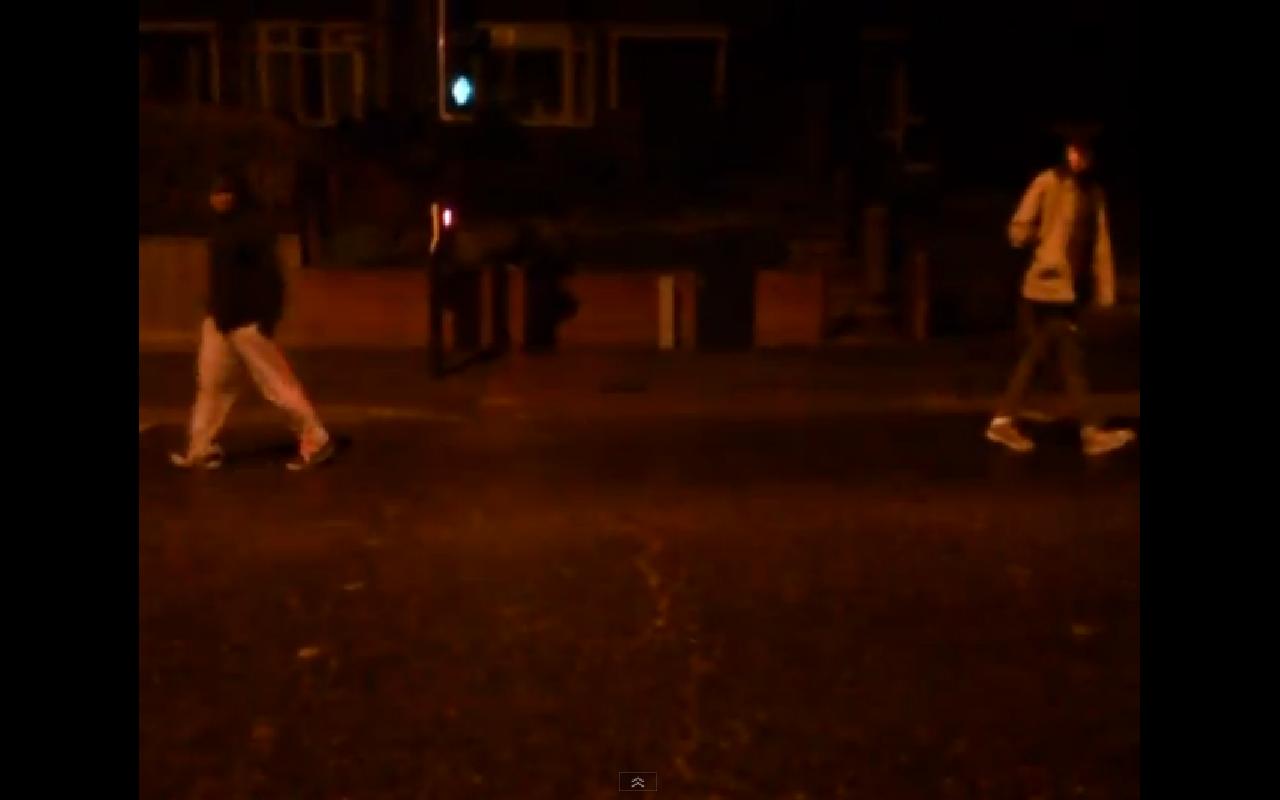
Ending shot of narrative

Close up with background information (drummer) on guitarist

Ending scene for band shots

Close up on first band shot with fade from edited text

Close up on drumroll

Fades between narrative shots

Close up on guitar solo

Close up on guitar solo

Using lighting to add effects on band shots

Again using the lighting to add a mood to shots

Close up on singer

All of the above shots are symbols of the conventions used in the creation of a modernised music video. Close ups are a very popular in the twenty-first century along with these specific traits found in music videos under the 'rock' genre.

  • Usually dark/deep colours
  • Displays the band performing on stage
  • Can include a narrative
  • Eerie/weird videos
  • Uneasy camera movements
  • Hand-held shots
  • Usually little or no special effects on the band shots, however if a narrative is used special effects are abundant.
Long shots, close ups and extreme close ups were constantly used. Close ups are usually used in music videos as it puts emphasis on the artist of bands face for promotional reasons and their lips to show the lip-syncing. Loads of different camera movements are used throughout, including pans, dolly track shots, improvised crane shots and tilts. These usually followed the movements of the band or singer. Jump cuts are the most common shot used in our video, the purpose of a jump shot is to jump from a scene of the location to the artist/instruments and vice-versa. Reaction shots were used in our music videos with the narrative as it expresses the relationship between two or more people. The pace of the editing is always in synch with the beat of the track. 

The Video! - The Finished Product

The Video! - Other conventions taken into account when piecing together our music video

There are three main conventions to take into account when producing a music video, the storyline/narrative within a music video, the "live" footage and also the conceptual ideas that are presented through imagery in a music video.


  • Performance - To convey a sense of 'in-concert' experience. Performance orientated visuals cue viewers that the recording of the music is the most significant element.
  • Narrative - Linear, love-stories are the most popular, action within a narrative is dominated by males who do things and females who react passively or wait for a reaction.
  • Conceptual ideas - Add a mood and can offer multiple meanings. 
These concepts describe the form and content selected by the director to attract viewers and convey a direct or indirect message. They can act as advertisements, as popular art forms or as self referential filming texts.

Narrative and performance: Steve Archer (2004)
"Often, music videos will cut between a narrative and performance of the song by the band. Additionally, a carefully choreographed dance might be part of the artist's performance or an extra aspect of the video designed to aid visualisation and the 'repeatability' factor. Sometimes, the artist (especially the singer) will be part of the story, acting as narrator and participant at the same time. But it is the lip synch close-up and the miming of playing instruments that remains at the heart of music videos, as if to assure us that the band really can  kick it"

We took this quote and used it as a guideline when piecing our video together; such as the line "lip synch close-up and the miming of playing instruments that remains at the heart of music videos", this gave us a broad idea as to what makes up a high quality music video.

Tuesday, 28 February 2012

The Video! - Putting it together

After editing a variety of the shots we took; including both band and storyline clips, group then put the clips in order and made the cuts hit each sync throughout the song. Any analysis of a music video will state that sync is the most important thing in creative a realism effect throughout the production. Altogether we took around two and a half hours of footage for our video, all of which compressed into three and a half minutes, to create our music video.

The slide-share below is by a media student named Rachel Kealy, our group studied this presentation when putting together our clips to create our video.

This slide-share helped us to decide which clips to use, and when you over over 250 to choose from, that is a big bonus! All the conventions that create a good music video can be found on this slide-share including colour, mise-en-scene, editing and many more. This gave us a better insight as to which clips we should choose and where to put them!

We focused mainly on the sync when putting together our music video. This is because sync is the most noticeable error in any music video if not portrayed perfectly. 

The Video! - Editing our shots

When editing our shots we took many things into account; including which shots to edit, and when. As some shots look more realistic without editing, whereas others require editing to fit the sync of the music. Our group stuck to certain rules when editing the shots we initially took:

  • Motion - Does the cut reflect what we believed the audience should be feeling at the moment
  • Story - Does the cut advance the story
  • Rhythm - Does the cut occur at the right moment rhythmically and does the editing within the shot feel right
  • Eye-trace - This was a convention we researched previous to filming, it essentially questions whether the cut of a shot or the editing within a shot pays respect to the location and movement of the audience's attention and focus of interest within the frame
  • Two-dimensional place of the screen - Does the cut between shots respect the 180 degree rule
  • Three-dimensional space of action - basically does the cut look right or out of place in relation to the physical/spatial relationships of the mise-en-scene
There are many editing types that we took into account whilst improving our shots further. These include basic and complicated editing specifics. Some of the basic conventions include the cut, the dissolve, the 'L' cut and the 'J' cut.
  • The cut - occurs when two scenes are slammed up against each other with nothing in between them. These are the kind of cuts favoured by music video editors (hence caught our groups eye!). Sound and image transfer instantaneously from one picture to another. This is the most common type of edit. It works really well for telling a simple story or where the action moves from one place to another quickly (as it does in our storyline, from Canford Heath to Moors Valley). The most famous example of this is in David Leans's "Lawrence of Arabia" where the lit match is blown out and instantly cuts to the rising sun. (Example below)

For the edit, skip to 1:18!

  • The Dissolve - This is where one scene overlaps another at the beginning or end. This type of edit is favoured by the guys who put the beginning of movie trailers together: The scenes where character are discussing things and screen slowly fills with black. A title appears very slowly and is replaced by another scene. This is a dissolve. Very effective for pacing and for extending scenes out. We used this in both the beginning and end of our video.
  • The 'L' cut - This is a transition between two scenes where the sound and the visuals transfer at different times. In an 'L' cut the sound for the original clip is retained after the visuals have been transferred to the second clip. Usually this occurs during a conversation where one person may be talking and the picture switches to someone else listening to them. The first persons stops talking and the second person continues. It's called an 'L' cut because when editing, the sound and picture are cut in two separate points which creates an 'L' shape on the timeline!
  • The 'J' cut - is the opposite of an 'L' cut, where the picture shifts before the sound. Good examples of this can be found in Western Movies where the sound of a train can be heard arriving then the picture cuts to the train pulling in to a station. (This editing convention is hard to employ in to a music video and is usually un-successful).


The Video! - Why we chose Premiere CS5 for editing

The following screen shots are from tutorials on how to edit in music using Premiere CS5, and also how to simply edit clips together using Premiere.


The initial edit of a single clip


Moving the clip apart and creating space for an overlaying clip


Inserting the overlaying clip


Editing the clips together (seen along the bottom of the SS)

The previous four screen shots are from an editing tutorial on premiere CS5 pro, these tutorials helped our group in making the decision to use premiere as they explained just how simple the program was to use and how easy it was to edit clips together using the program.


Adding a few video clips in to the feature


Separating the video clips from the music


Making the sound clip editable to create a perfect sync

The previous screen shots are showing how to insert a music clip into a series of videos using Premiere, this was essential for us, as we are creating a music video, editing using the backing track - Monument, ADTR, was crucial. The sync for our video was the main issue on our minds during the editing process and hence we kept referring back to these tutorials to make sure it was perfect.

The Video! - Choosing shots for specific areas of the video

Synchronising clips with the song

This is a link to a tutorial for Premiere CS5, the program my group decided to use to edit and sync our music video. This tutorial was one of many our group studied in relation to the best possible way to sync the clips to the song perfectly. Premiere allows us to overlap clips and edit them in the ways we wanted, and therefore sync was not a huge issue, especially after studying such tutorials as the one above.

The Video! - Filming storyline shots

When doing the research into our storyline shots we made many storyboards and sketches as to the specific shots we desired for the best outcome (see planning). All of this helped us to know exactly what we were after in relation to the specific locations and angles to the shots we were taking. Our ideas consisted of:

  • An urban tunnel shot, including the protagonist (myself) being filmed from many different angles walking down the tunnel after beginning with my back to the wall. This shot is going to be cut into many different angles, each shot only lasting maximum of 1 seconds - this will be achieved through editing.
  • A shot of conflict between myself and Neelesh in Canford Heath. This will be a cut shot once again using the driving away in a car, after a couple of short length shots showing the dispute between us as actors within the shot.
  • A variety of shots at Moors Valley; these will include pans, cut shots, short length features and also close ups, all of which will add to the telling of the story within our video
  • The finishing shot will be in the centre of a road, with both myself and Neelesh walking away from each other leaving the shot. This is a shot used in many films and music videos alike as it finishes a storyline off well.
We went out on a variety of days to film our storyline shots, this was because of weather problems and also technical difficulties including the cameras running out of battery on multiple occasions! We kept to our planning and research into the shots we desired and recreated them fantastically. The outcomes of our storyline shots came out as intended and should be easily editable to create the desired effect.

The Video! - Filming band shots

We took many things into account in both the planning and the shooting of our music video; below is a list of all the conventions we took into account when producing our video:

  • Plan each individual shot and every detail, like who the lead character is etc
  • Choose the entire cast before filming; (even background characters, technical producers etc)
  • Get props for the set, a camera and lights - Luckily our group had lighting before we began filming due to the location we decided to film our music video in. We plan to focus the lighting to use its full effectiveness, and also to manage the spot lights for close ups etc
  • The protagonist/main person in the shot, is always the brightest on the screen - Reflectors, such as the floor in our case, produce huge amounts of light upon any member of the band the directors desire, we plan to use this effectively in all our band shots
When Filming!
  • Finding the ideal setting - we managed to do this through the availability of the school hall (luckily for us!)
  • Set up the camera where you can see everybody in the video. Tripods are excellent for this purpose, because you can smoothly turn the camera, and you avoid the "shaky-hand" taping that screws up a great performance.
  • Determine whether some people will be playing and who is singing at certain points in the shot. If someone is singing at the wrong point where the rest of the video is perfect the shot can not be used, however good the rest of the shot is.
  • Play the song in the background whilst filming - this way everyone is in tune and on the same page, making the sync a lot better.
The websites below also helped our group when planning how to film our music video:

The Video! - Storyline planning

For the storyline within our music video, our group decided to plan what the story was going to tell before filming it, making the filming duties more specific, whilst making the outcome more realistic. We had many meetings previous to the actual filming and decided to make some planning sketches and storyboards as to decide which ideas we were going to use. We had many failed attempts in deciding as to what the story was going to entail, however we also had some success! Below are the storyboards we decided to carry through when filming our music video.


The two images (above) tell the story planned by our media group, split up into closer images to give a better view.


This final image is all the images in our story.

The first two images are close up images as to what our storyline will entail. The initial scenes show myself as the protagonist and Neelesh Joshi having a problem with each other, this is made clear by the fourth scene (roughly) which shows myself shouting at him and driving off in a mist of rage. The storyline has many ideas that, if filmed and edited correctly, could tell an interesting story keeping the viewer interested. 

The reason we decided to introduce a storyline into our music video was due to copious research that revealed viewers prefer to see a storyline as it adds diversity to the video. this is made clear through quotations like this;

"I enjoy music videos with a storyline. It always seemed to me that they became a compliment to the song and perhaps introduce in a whole new way, rather than just the typical music video featuring the singer just singing the song with a few dancers around them"

Monday, 27 February 2012

The Video! - Band Members


(Left to right) - Josh Graham, Travis Ashmore, Connor Hallisey, Neelesh Joshi


We were very lucky in our band members for the music video. Connor has experience in producing videos for his band, deadlines. This gave us a great advantage as he was used to being in front of the camera and added a real presence to the overall effect of the film

Josh Graham was a good friend of Nelly's who came to help us out, and in just one night learnt the entire song  as lead guitarist. This gave us a huge bonus to filming as we could now use close ups on the guitar solos and also all the playing was in time from the lead guitarist

Myself (Travis) hadn't played much  riff guitar before, however this didn't turn out to be much of an issue as when we researched the chords there was only 2-3 that were a necessity to learn, this helped us as the riff guitar now fit with the song also - adding more realism.

Neelesh has played drums for a number of years and is of a high grade. This was another bonus and although not learning the song, his improvising on the breakdown and throughout the choruses made it really easy for us to choose the shots we were going to use as most of the synchronisation was perfect.

The Video! - Actors (storyline)


Neelesh Joshi


Myself - Travis Ashmore

The reasoning behind the choices of our actors within our storyline is simple. We were both in our media group to begin with. Our first choice for the protagonist actor (who later turned out to be myself!) was Will Fletcher. However, due to a shortage of time, Will was not able to be in our video. Due to the fact that both me and Neelesh were in our media group, we had similar, if not identical free periods during school hours. This gave us the opportunity to film some of our storyline during school time (when permission was granted). We also spend a lot of time with each other outside school, along with our other media partner Reid Marsh, therefore we had a lot of time do film our storyline, which was a bonus.

Friday, 24 February 2012

The Video! - Equipment/Props

The creation of our music video required lots of props and equipment to create a realism effect about the mise-en-scene of the location. Listed below are all the props used when recording the band shots to help our music video gain a more realistic feel to create an overall better quality production for the viewer:
The camera we used was a 480p HD handheld video recorder.


The reason for using this camera was simple; it was easily accessable and did not require any form of transport to be re-located. The camera was of a high quality (480p) and worked fantastically with a small grain over to recreate a great production. The fact the camera was HD was an added bonus, giving a better quality of imagery and in a higher definition with more pixels. The camera could also be used for still shots incredibly easily, as it was accessable to most tripods. Due to the camera being small enough to be handheld, it could also be used fantastically for moving imagery, such as pans and wide based free handed shots - this gave us a broader range of shots to create a better overall production.

This camera is also very easy to use when editing/reconstructing the shots taken. The shots are easy to edit with such effects as blooms and wide pans as the pixel count is high. The high definition also means the quality of the video is not lost if a zoom is necessary - this was an added bonus for the close ups used throughout our video. Close ups are a convention used in almost any music video and hence this was a necessity for us, this camera allows us to play around with the close ups and edit some of them in after the shots had been taken rather than creating the shot on the day.

Thursday, 23 February 2012

The Video! - Band Shots Research

There are many different types of band shots; and as the setting we are using is a vast one with no background to worry about we researched into the many different types of shots we could potentially use, and how effective each would be. We tried to incorporate all of these in our video;

The Pan is when the camera pivots horizontally while it stays otherwise stationary. Imagine an invisible, vertical line going down through the top of your camera, allowing it to spin left or right around this axis. Panning is used to slide a shot from one person to another, to add action to a tense scene, or to introduce a new element that was previously outside the frame.

Tilt is an up-down type of camera movement where the frame changes vertically as the camera stays in place. It can be thought of just the same as a pan, except that the camera moves along its horizontal x axis and the framed area moves from the “ground” to the “sky,” or vice versa. A tilt can show the base of a tree trunk all the way up to its tallest branches, or the foot of a giant, and extend up until you can see the top of the giant’s head.

A Dolly is physical camera movement toward or away from its subject. For example, there are scenes in movies that begin in outer space. The camera begins to dolly in and you see the galaxy, the solar system, the earth, the continent, the country, the city, the building, the person, etc. This would be an example of an extreme (and at least partially computer-generated) dolly. A normal dolly is just movement along the ground in relation to whatever is being filmed.

The Truck is the movement past or alongside an object. You might see a train moving at a high rate of speed with the camera trucking along beside it. A truck does not necessarily keep anything within a certain distance, but is simply the camera moving along a path while facing sideways. When you’re in the car and you look out the window, if your eyes were the camera they’d essentially be “trucking” along the scenery beside the road you’re on.

Pedestal shots are another movement of the camera in space, this time along the y axis. The same situations mentioned with the tilt movements above could be applied to the pedestal shot, except that instead of pivoting up and down to view the range of areas in the shot, the camera actually moves (rather than rotating) up and down from the bottom point to the top, or the opposite.

An Arc is a fairly difficult shot to pull off free-hand. This is when the camera rotates around its subject, keeping the same distance but changing the angle at which it views that subject. The slow-motion arcs in the Matrix movies are perhaps the best and most widely recognized example of this technique (although those were done with multiple cameras instead of just one).

All of these shots are seen throughout music videos of today's era, this is hence why we are going to try and incorporate as many as we can into our video to create as much of a realism effect as possible, and to make the video look as professional as possible also.

The Video! - Storyline Research

As the song we have decided upon is played by a band within the rock genre, our group decided it would be best to stick to the conventions of a modern day rock music video. Where the band play the song in a certain setting, backed with an underlying storyline, presenting the viewer with an interesting watch as well as a realistic impersonation of the song itself. This is seen in many modern day music videos throughout all genres.

Nickleback - Far Away

Heart In Hand - Only Memories

Deadlines - Past & Perceptions

We also decided to use these conventions and incorporate a storyline into our video, after studying these videos a plenty, it is apparent that a storyline adds contrast to any video and makes it more interesting for the viewer.

The storyline we are going to follow is that of betrayal, the protagonists in the story will be myself and Neelesh Joshi, the plot consists of Neelesh betraying me. It is related around a love lust as are many stories within videos in this genre; we believe this will add variety to our video and make the overall consistency between band shots and the contrast the story brings a lot stronger, making the video a better view for our target audience.

The following images are those taken from a link above (Nickleback - Far Away). This video consists of a fantastic storyline; unfolding an epic series of events without words. The story makes perfect sense as it follows the plot of two lovers, a man and a woman. The man has to go for a call-out to work as a fireman, he is then left at the scene of a blazing field when trying to save a stranded male. Just when all hope seems to be lost for the female protagonist lover, her male counterpart unfolds himself from the crowd and it has a happy ending! The storyline fits the song style, along with its lyrics - and this is what we are trying to achieve with our story.

Opening story scene, a couple in bed together. For the viewer this gives an instant feeling of happiness; it also leaves any potential for the future storyline, giving the viewer no idea as to what is going to happen, and hence a reason to pay attention to the rest of the story.
 Storyline shot no.2, this is where the male protagonist has found out some bad news, however, the viewer is yet to know what this is. We can only tell that it is bad news by the reaction they both have, in particular the female protagonist, who is clearly in distress from the news.
 Storyline shot no.3, this is where the viewer has a more detailed insight in relation to the plot of the storyline. It is now clear that the male protagonist got a call out from work (as a fireman) that he needs to leave for his duties.
 This is a storyline shot, seen after that of a TV showing a forest fire. This gives the viewer the idea that the male protagonist has been left behind in the burning forest by the rescue helicopter. This scene is instantly followed by a tree falling down in his direction - giving the impression he has been killed.
 This is followed with this scene, where the female protagonist (girlfriend of fireman) receives another phone call, again with bad news by the looks of things. This gives the viewer the impression that she is now being told about her late husband/boyfriend.
 This is the following storyline shot, where the male protagonist, after all the controversy, appears from behind a line of his co-workers; to the delight of his girlfriend (female protagonist)
This is the final scene of the whole video, as said in the previous description, this storyline tells a magnificent tale without words. The viewer is informed of all necessary information to let them piece together what happens by themselves, keeping them intrigued in the video and its antics.

The Video! - Location

Band Shots

We put a lot of thought into the location of our music video; we looked at many other videos from the same genre to find out what the consistent trend it among them in terms of location for band filming. We came across many variations from the norm; including mountain terrain, forestry, barn houses and backdoor footage. However after careful consideration we decided to use a vast recording area, with a plain background. This reasoning behind this is that it allows us to use both lighting and mise-en-scene much more effectively.

A local drama studio was on hand to use, which fit perfectly into the style of location we pursued. It was a vast, open area with little distraction on the walls/flooring; this gave us plenty of free space to work with. The studio also consisted of a high tech lighting system, used for drama productions. This meant we could expand on the normal conventions of a music video in this genre in that we could adjust the lighting to suite the specific shots we were using.


This is an image of the curtain we are going to pull across the background to our band shot, the reason for this is to eliminate the issues associated with background props being in the shot, and also, a black background to a music video looks really well and makes editing the shots more accessible.


This is a wider shot of the background of our music video, without the curtain drawn. As you can see we have a very wide base to work off when producing the band shots, the flooring is a great contrast to the black background and creates a great effect with the lighting.


This is the whole room in which we are going to be producing out band shots. The room itself is very large and hence we have a lot of space to work with when placing the props such as the instruments. In this shot you can also see the lighting we have available - a great asset to this location.

These are the specific lights we have to use for our band shots. The lights have multiple colour options and give off a great effect with the wooden floor, which we intend to take great advantage of. The spot lights (right image) give off a fantastic effect if a close up is required, this is perfect for our band shots as close ups' are a necessity to the success of a realistic effect within a music video.

-----------------------------------------------------------------------
-----------------------------------------------------------------------

Storyline Shots

Much consideration went into where we should shoot the majority of our storyline shots. However, with no certain outcome, an array of different locations were selected

· Moores Valley Country Park – for long distance scenery, and open screen shots (as well as wide pans)


· Urban tunnel areas amongst Poole Park – for close up and details shots, getting more specific to the storyline

· Canford Heath – A very vast, open space. This gave us the opportunity for distant shots and the use of focusing on both the protagonist in the film, as well as the background.


· Long stretch of road (Ashley Cross, Poole) – This is for a final shot in the film, giving us the chance to have a wide shot including both background material and keeping in depth storyline at the forefront of the film.

The Video! - Song Choice

Song Choice

Our music video will be a representation of a song from the ‘rock’ genre; this decision came about as the members of our group (Neelesh Joshi, Reid Marsh and myself) are all tremendous fans of the genre and the music our era creates within it. We took into consideration many different factors when deciding on the song we were going to be using; including the breakdown, changes in pace throughout the song, how easy the song is to replicate and whether the video will present a sense of realism for the viewer. After considering many different artists including ‘Abandon All Ships’, ‘You Me at Six’, ‘Underoath’, ‘Periphery’ and many more, we decided to choose ‘A Day To Remember’.

About ADTR

A Day to Remember is an American rock band from Ocala, Florida. Founded in 2003 by guitarist Tom Denny and drummer Bobby Scruggs, the band has released four studio albums, nine singles and eight music videos. They are mainly known for their unusual amalgamation of metalcore and pop punk as a musical style.

A Day to Remember have been described by critics as metalcore, pop punk, post-hardcore, and emo-pop. They have been described as a fusion of "emo, hardcore, and metal". A Day to Remember's song structures typically follow a metalcore verses and blends into a more pop punk style chorus. Fans and critics alike have described this blend as "pop-mosh," and "popcore". When asked in an interview with AbsolutePunk about their sound, Jeremy McKinnon stated:


It's weird. See, it's funny because we have been doing this for so long. When we started, this shit was not cool. Everyone told us mixing the two genres wouldn't work. Hell, a lot of people still feel that way. We've just always played what we wanted to hear, and to be honest people weren't doing it back then. We loved pop punk, we loved hardcore bands, and we couldn't decide what to be. So we said fuck it. Let's do them both.


—Jeremy McKinnon


Band Members

Current

§ Jeremy McKinnon - lead vocals (since 2003)

§ Neil Westfall - rhythm guitar, backing vocals (since 2003)

§ Joshua Woodard - bass guitar (since 2003)

§ Alex Shelnutt - drums (since 2006)

§ Kevin Skaff - lead guitar, backing vocals (since 2009)

Former

§ Tom Denney - lead guitar, backing vocals (2003–2009)

§ Bobby Scruggs - drums (2003–2006)

§ Brandon Roberts - drums (2003)


The song itself!

The song we decided upon is called ‘Monument’. The reasoning behind this choice was that it complimented the style of video we had in mind; it also filled all the necessary conventions of a good modern song, whilst maintaining an old grit style – which I personally really enjoy. The song has lots of pace changes throughout, leaving potential for an interesting video and the opportunity for many different shots and cuts throughout. Below is a link to the song, along with the lyrics.

Link to ADTR - Monument (with lyrics)